
June 11, 2025
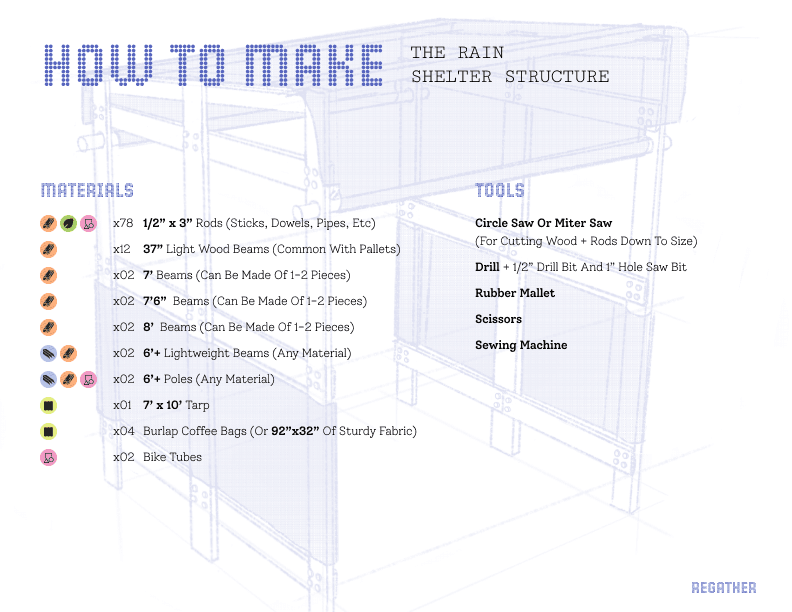
RAIN SHELTER STRUCTURE
RAIN SHELTER STRUCTURE
A sheltered gathering space made of wood scaffolding and connected through dowel joints.
MATERIALS


x78
1/2” x 3”
rods (sticks, dowels, pipes, etc)
x78
1/2” x 3”
rods (sticks, dowels, pipes, etc)
x78
1/2” x 3”
rods (sticks, dowels, pipes, etc)
x12
37"
light wood beams (common with pallets)
x12
37"
light wood beams (common with pallets)
x12
37"
light wood beams (common with pallets)
x02
7'
beams (can be made of 1-2 pieces)
x02
7'
beams (can be made of 1-2 pieces)
x02
7'
beams (can be made of 1-2 pieces)
x02
7'6"
beams (can be made of 1-2 pieces)
x02
7'6"
beams (can be made of 1-2 pieces)
x02
7'6"
beams (can be made of 1-2 pieces)
x02
8'
beams (can be made of 1-2 pieces)
x02
8'
beams (can be made of 1-2 pieces)
x02
8'
beams (can be made of 1-2 pieces)

x02
6'+
lightweight beams (any material)
x02
6'+
lightweight beams (any material)
x02
6'+
lightweight beams (any material)

x01
7' x 10'
tarp
x01
7' x 10'
tarp
x01
7' x 10'
tarp
x04
burlap coffee bags (or 92”x32” of sturdy fabric)
x04
burlap coffee bags (or 92”x32” of sturdy fabric)
x04
burlap coffee bags (or 92”x32” of sturdy fabric)
x02
Bike Tubes
x02
Bike Tubes
x02
Bike Tubes
TOOLS
Circle Saw or Miter Saw
(for cutting wood + rods down to size)
Circle Saw or Miter Saw
(for cutting wood + rods down to size)
Circle Saw or Miter Saw
(for cutting wood + rods down to size)
Drill
+ 1/2” drill bit and 1” hole saw bit
Drill
+ 1/2” drill bit and 1” hole saw bit
Drill
+ 1/2” drill bit and 1” hole saw bit
Rubber Mallet
Rubber Mallet
Rubber Mallet
Scissors
Scissors
Scissors
Sewing Machine
Sewing Machine
Sewing Machine
STEPS
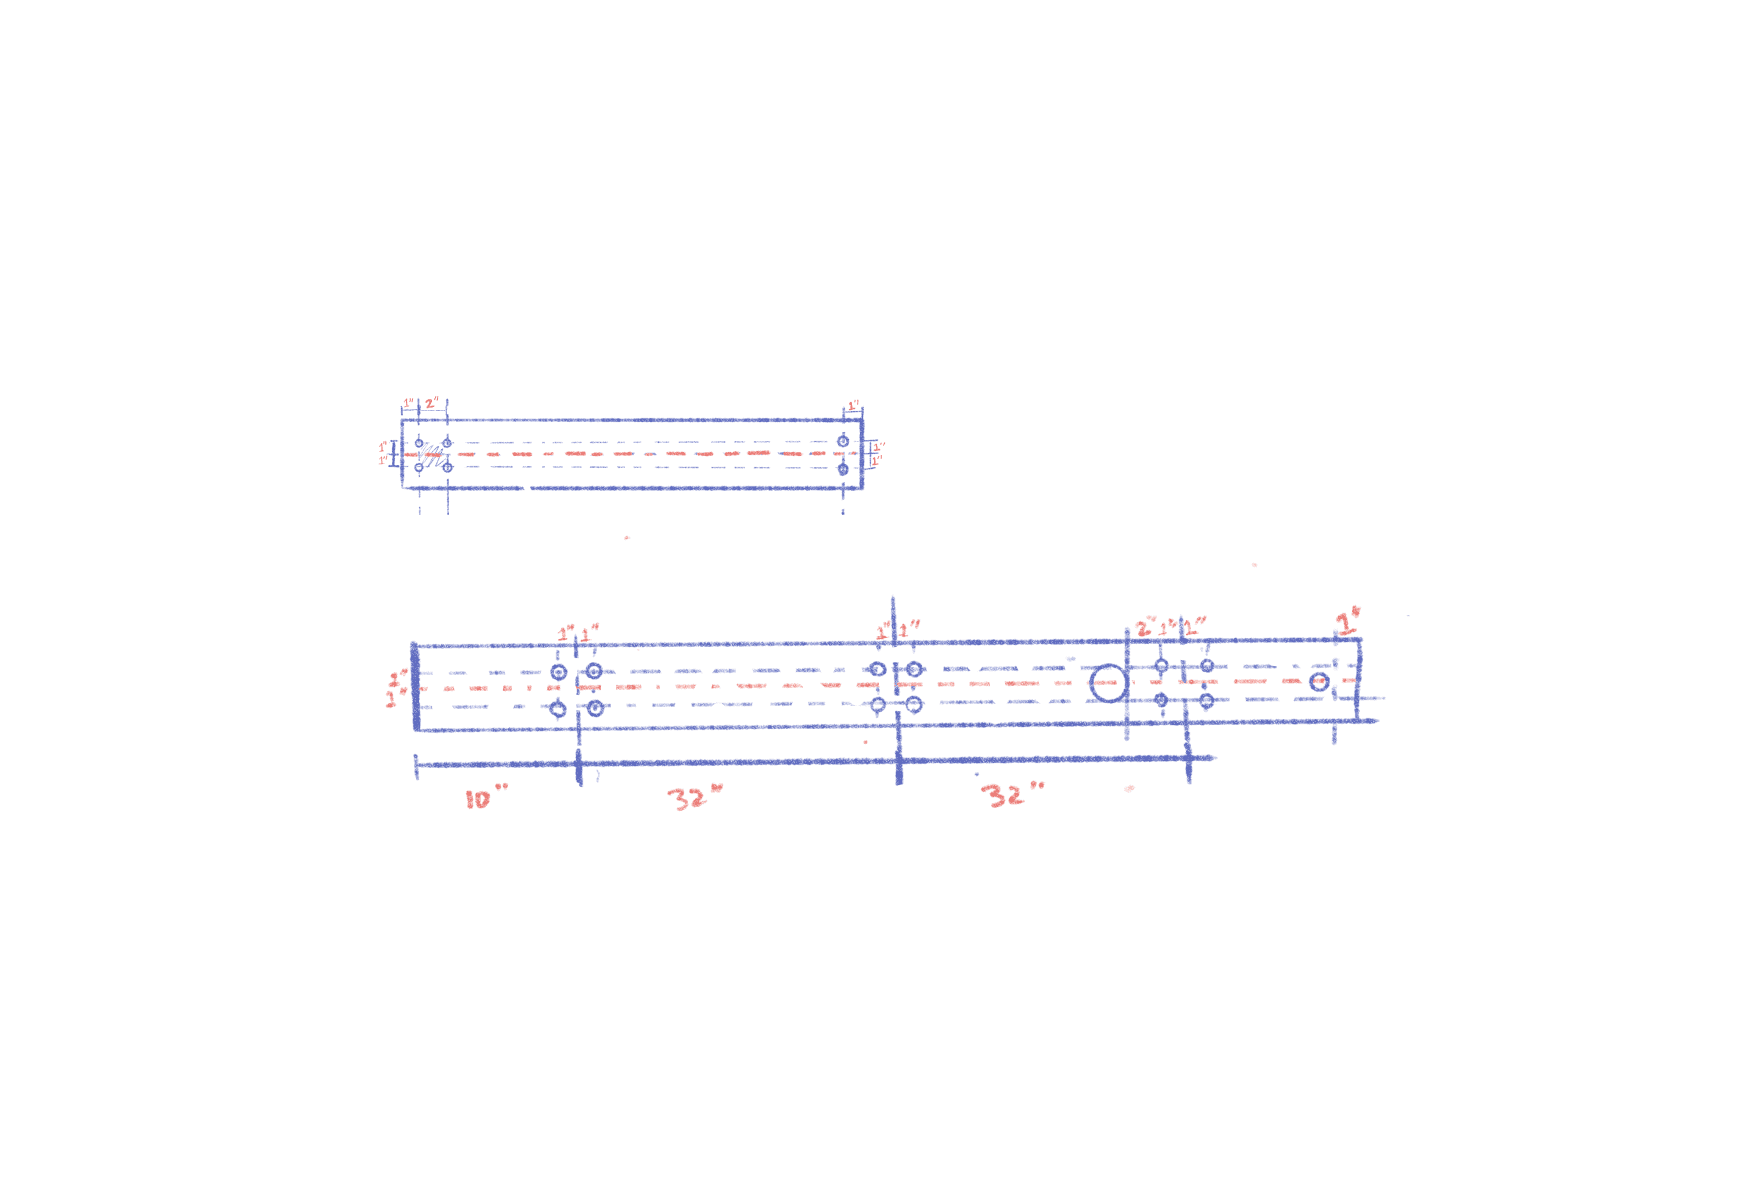
01
Using the 1” hole saw bit, drill 2 holes 3” away from the back edge, and 1/4 of the plank’s width from each side.
01
Using the 1” hole saw bit, drill 2 holes 3” away from the back edge, and 1/4 of the plank’s width from each side.
01
Using the 1” hole saw bit, drill 2 holes 3” away from the back edge, and 1/4 of the plank’s width from each side.
02
Cut each coffee bag open along both side seams, and sew all 4 together to make one big sheet of burlap.
03
Fold down each side and sew as shown to the left. These will make up the slots for the 7’ + 8’ beams. Cut along cut line.
02
Cut each coffee bag open along both side seams, and sew all 4 together to make one big sheet of burlap.
03
Fold down each side and sew as shown to the left. These will make up the slots for the 7’ + 8’ beams. Cut along cut line.
02
Cut each coffee bag open along both side seams, and sew all 4 together to make one big sheet of burlap.
03
Fold down each side and sew as shown to the left. These will make up the slots for the 7’ + 8’ beams. Cut along cut line.
04
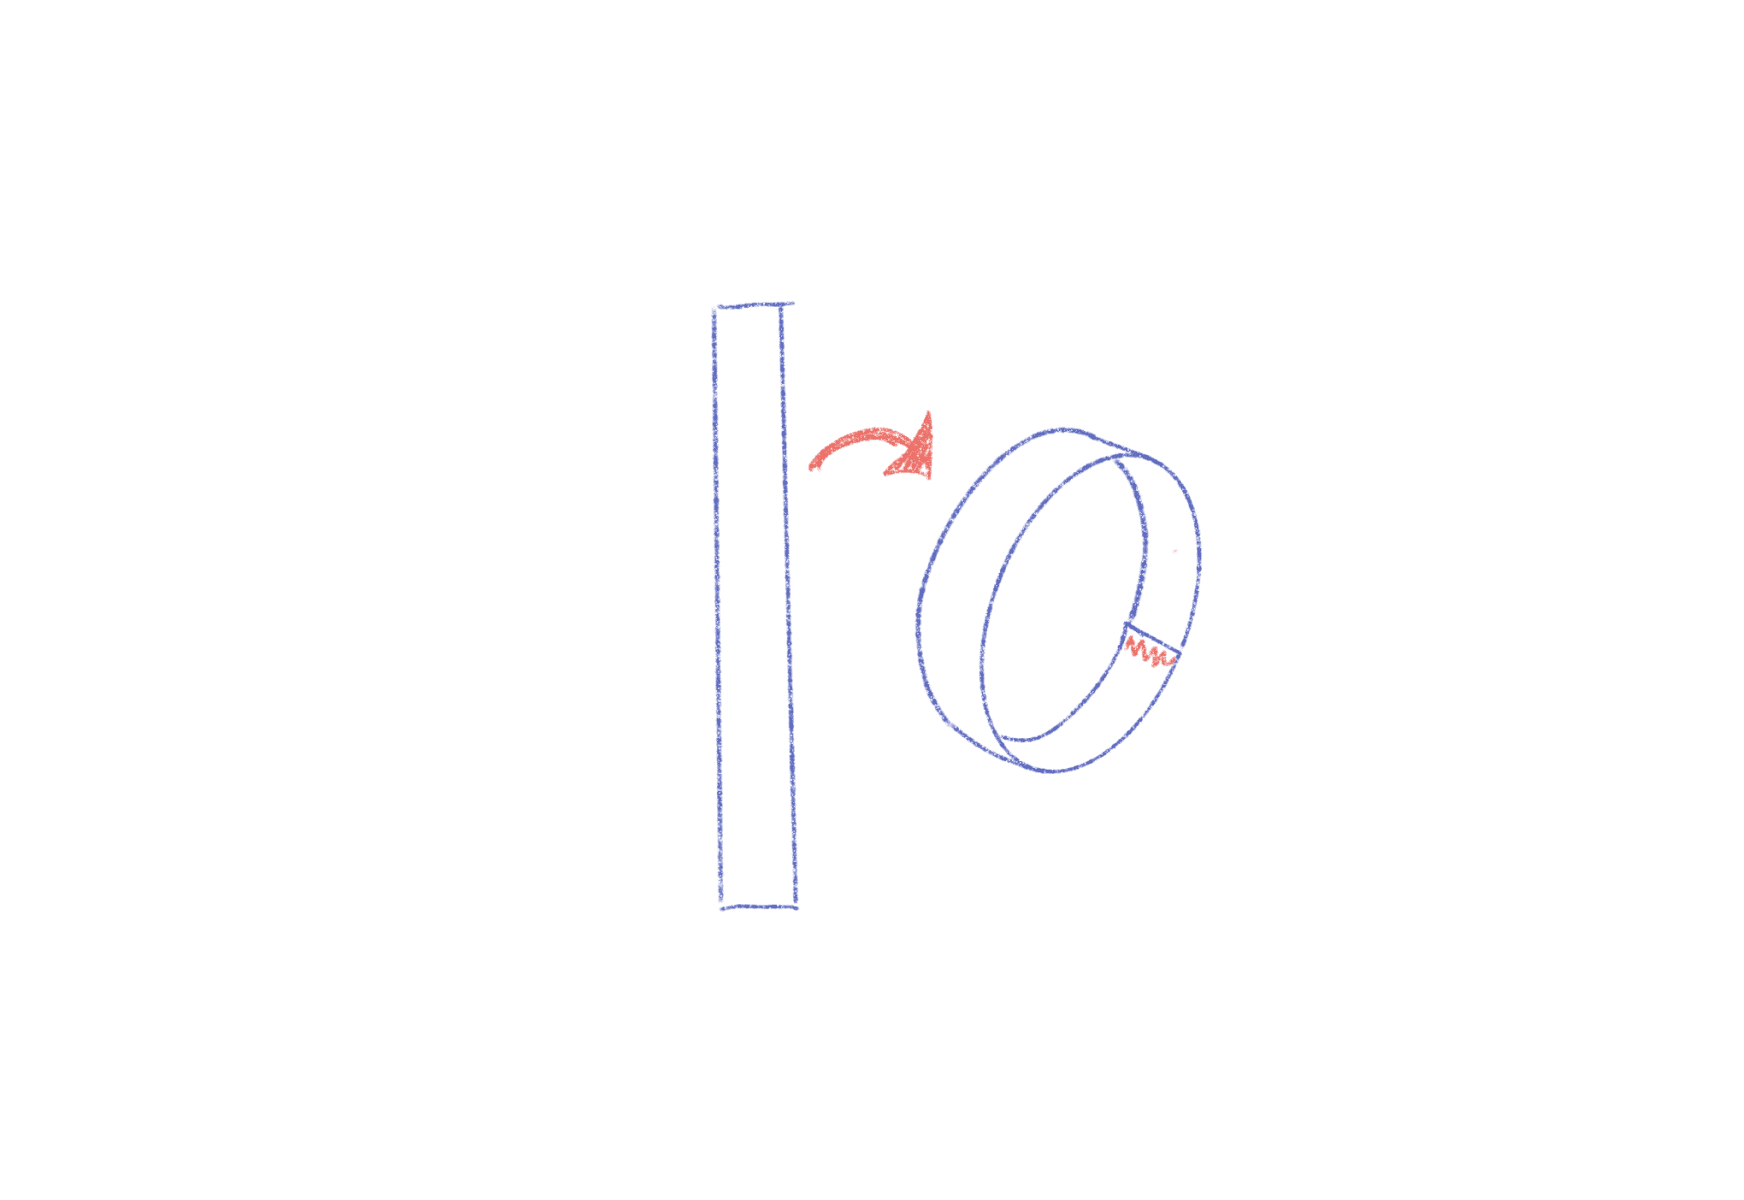
Cut the bike inner tubes into 4 x 12” strips and zigzag stitch each one’s ends together to make “rubber bands”.
04
Cut the bike inner tubes into 4 x 12” strips and zigzag stitch each one’s ends together to make “rubber bands”.
04
Cut the bike inner tubes into 4 x 12” strips and zigzag stitch each one’s ends together to make “rubber bands”.

05
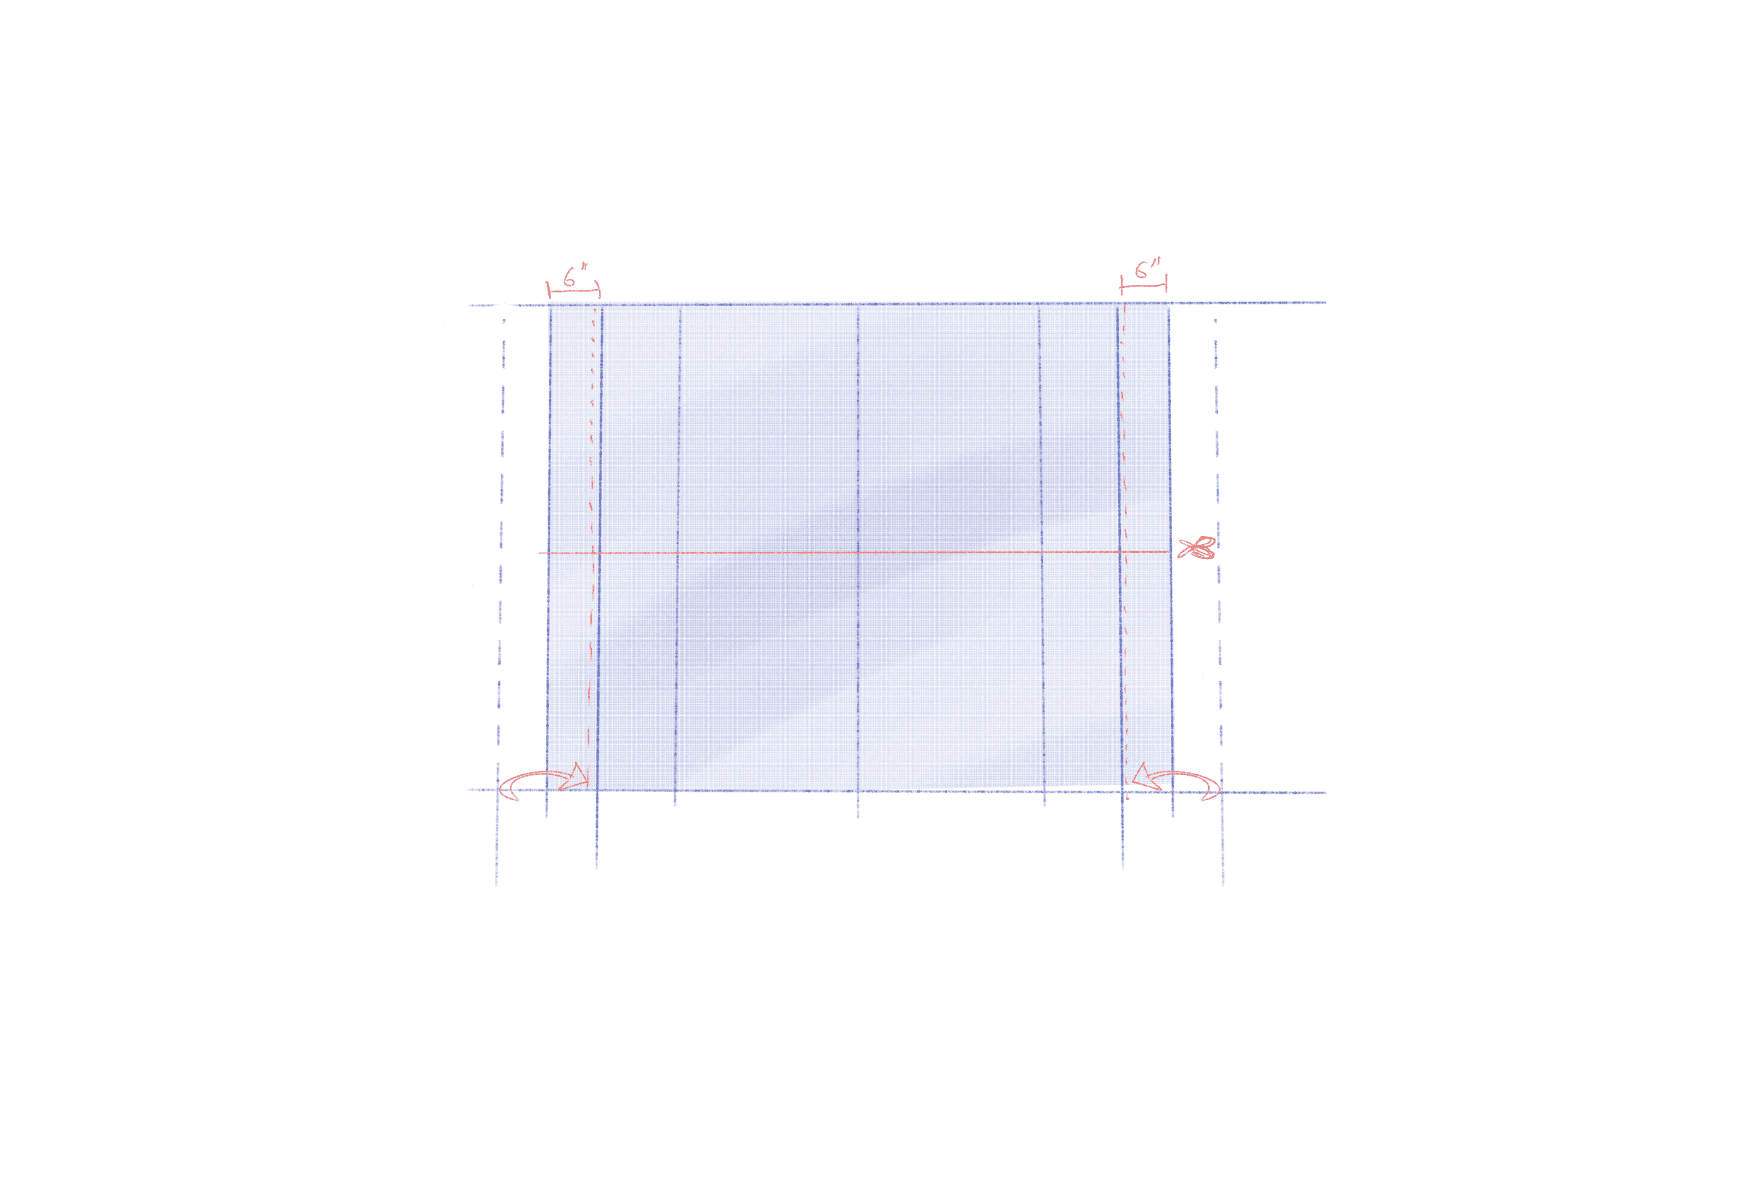
Sew slots for the 2 poles into the long ends of the tarp as shown to the right.
05
Sew slots for the 2 poles into the long ends of the tarp as shown to the right.
05
Sew slots for the 2 poles into the long ends of the tarp as shown to the right.
06
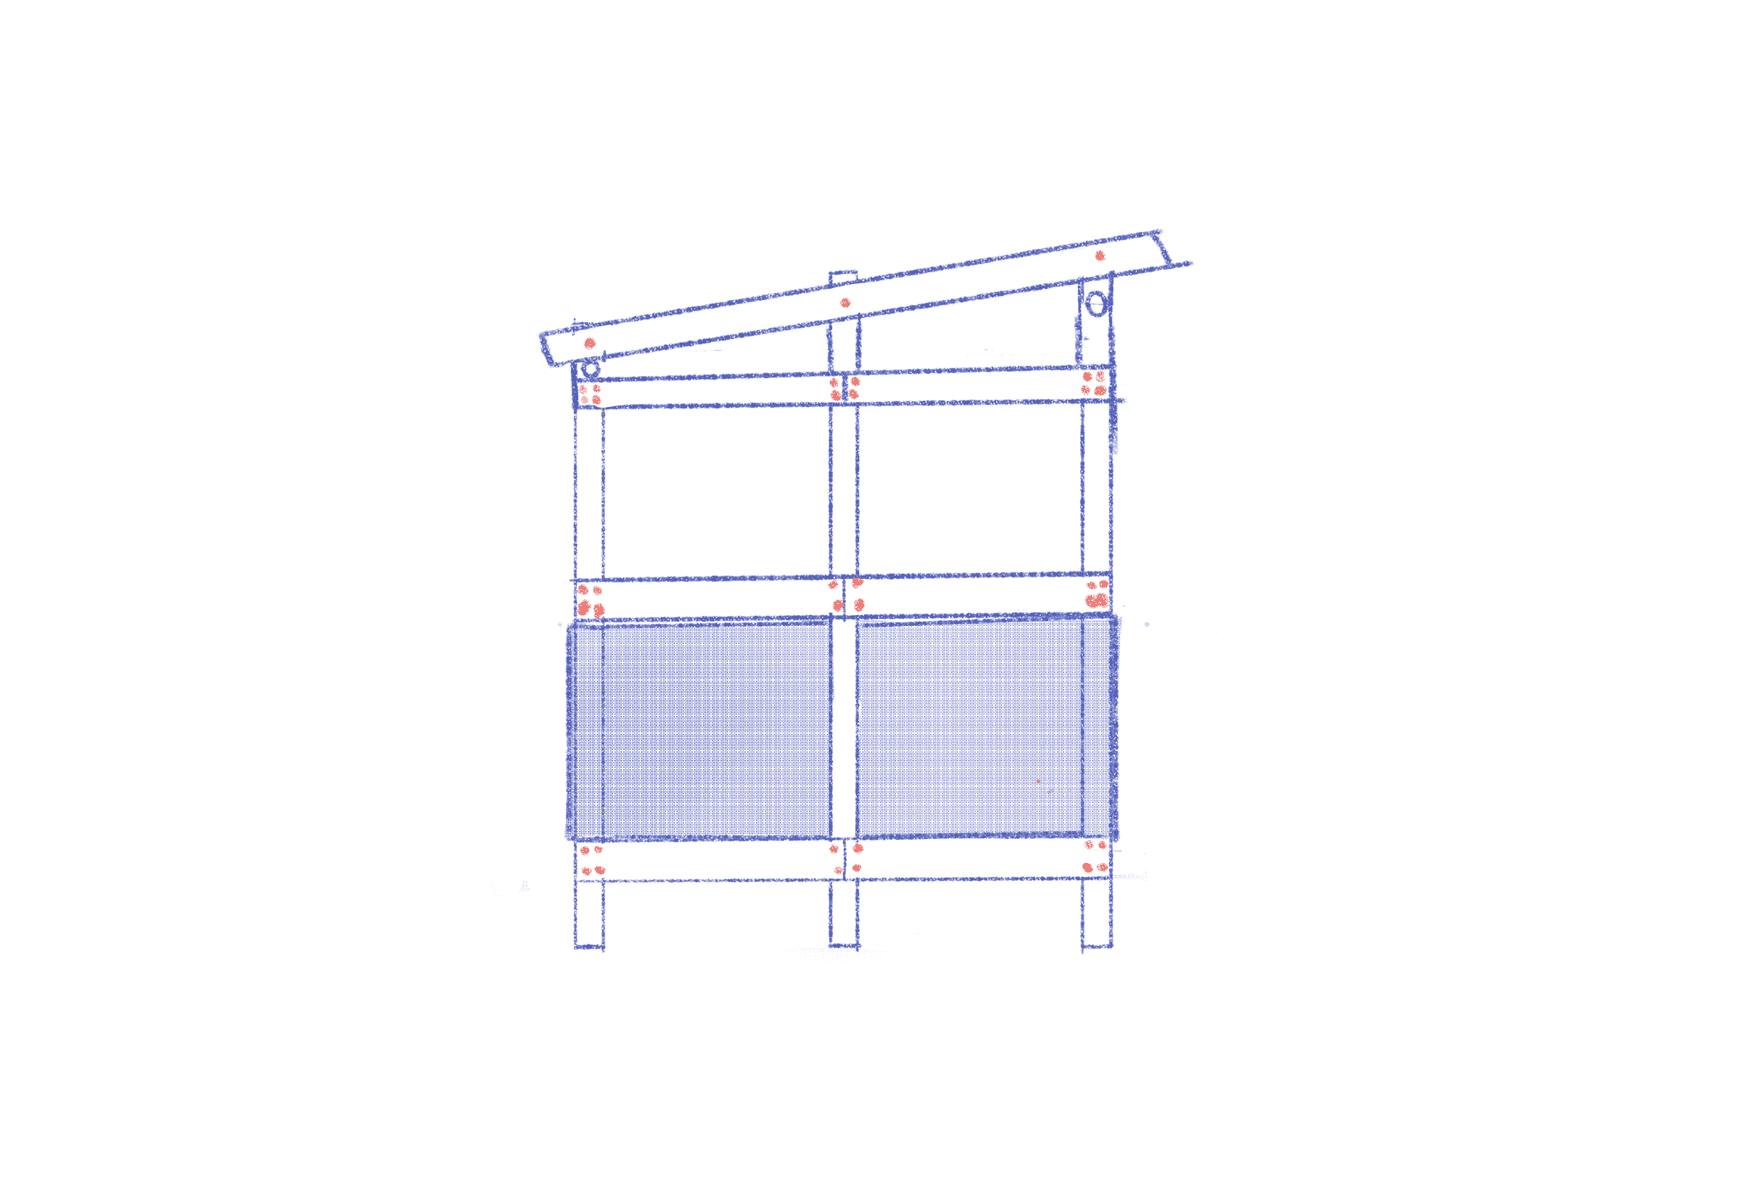
Arrange wood pieces in the formation on the left and connect each hole with a rod using the rubber mallet. Before securing the bottom cross bars, slide the coffee bags over the support beams. Repeat once and you have both of the walls!
07
Stand the walls up, and secure the 6’ lightweight beams onto the diagonal bars of the walls using the “rubber bands”.
06
Arrange wood pieces in the formation on the left and connect each hole with a rod using the rubber mallet. Before securing the bottom cross bars, slide the coffee bags over the support beams. Repeat once and you have both of the walls!
07
Stand the walls up, and secure the 6’ lightweight beams onto the diagonal bars of the walls using the “rubber bands”.
08
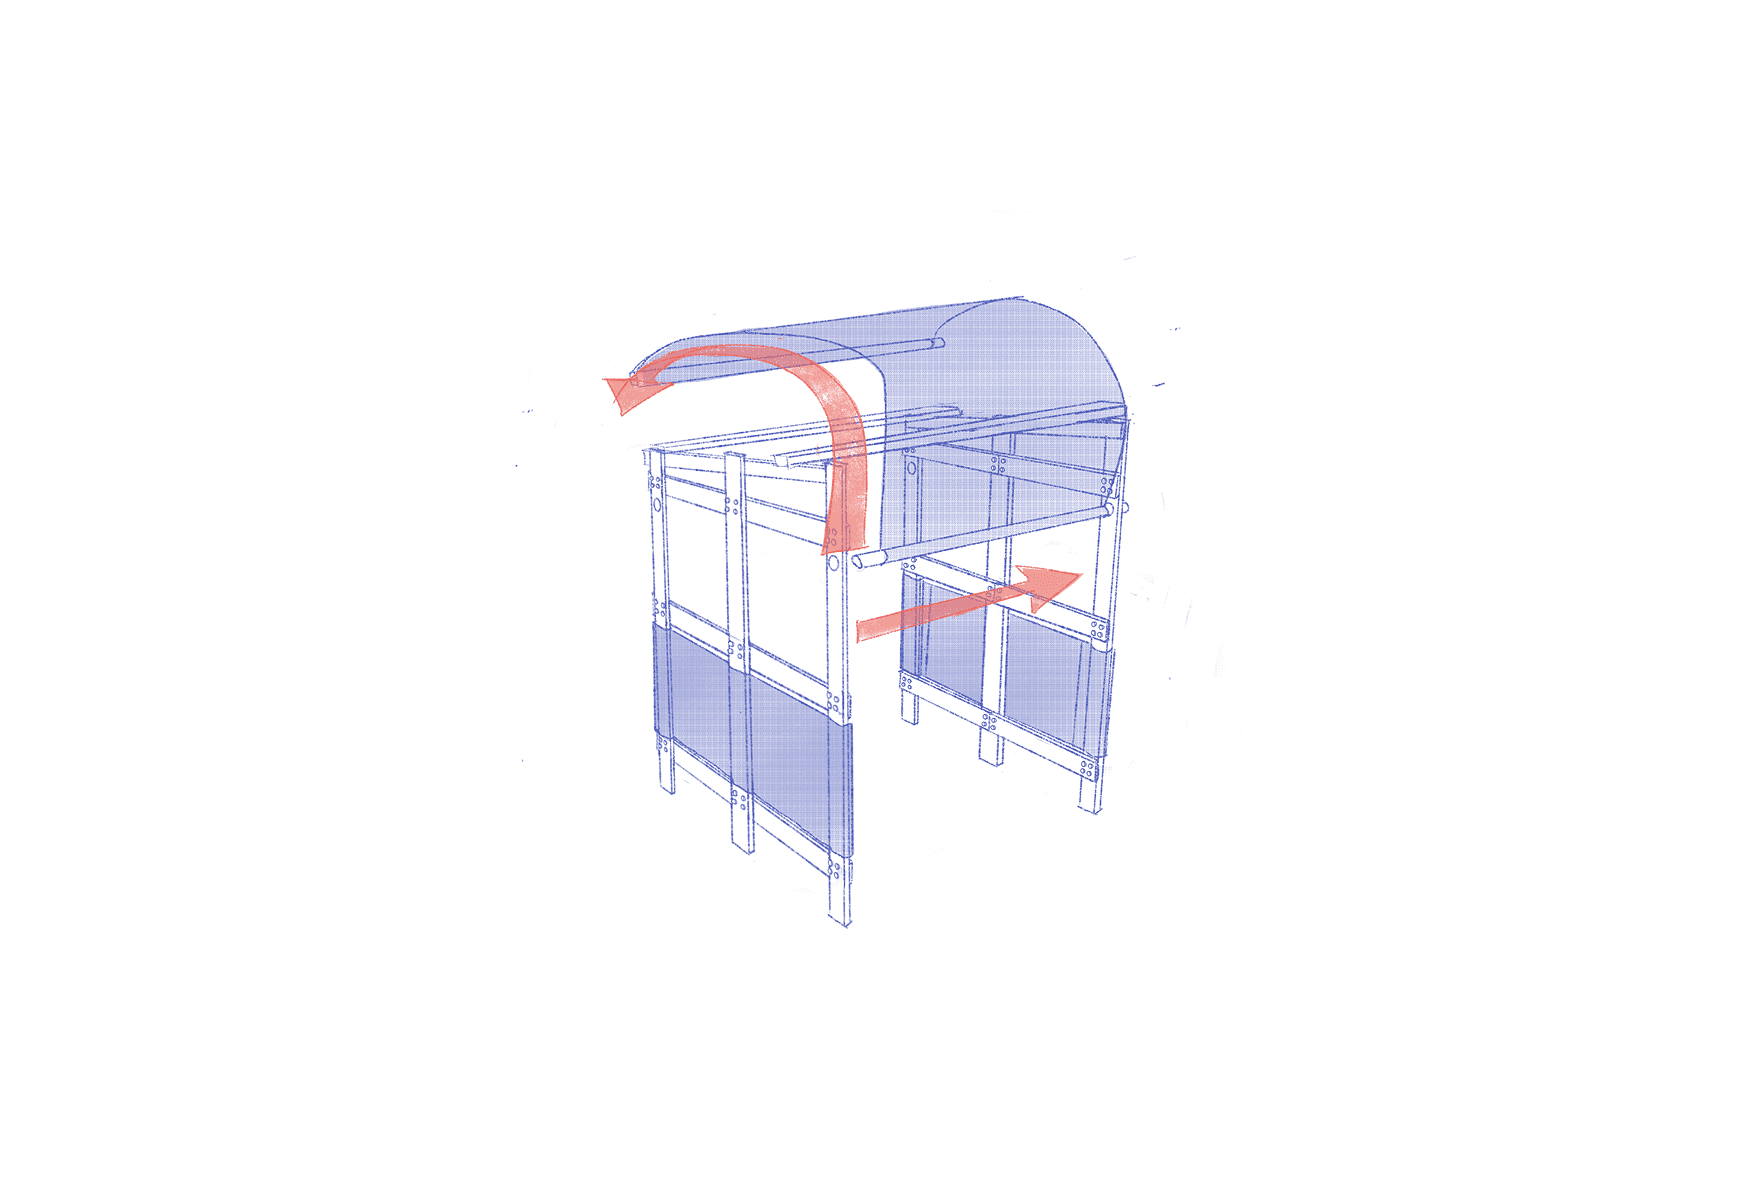
Insert one pole into one side of the structure, then wrap the other end with the tarp over the roof beams and insert the other pole on the other end.
08
Insert one pole into one side of the structure, then wrap the other end with the tarp over the roof beams and insert the other pole on the other end.
08
Insert one pole into one side of the structure, then wrap the other end with the tarp over the roof beams and insert the other pole on the other end.

09
The structure is complete! customize any way you want, but see the Modular Shelving Guide for some suggestions on shelving.
09
The structure is complete! customize any way you want, but see the Modular Shelving Guide for some suggestions on shelving.
09
The structure is complete! customize any way you want, but see the Modular Shelving Guide for some suggestions on shelving.


COMMUNITY SPACE INTERVENTIONS
THROUGH FOUND MATERIALS
COMMUNITY SPACE INTERVENTIONS
THROUGH FOUND MATERIALS