
June 11, 2025
MODULAR SHELVES
MODULAR SHELVES
Customizable shelves made with no hardware, just simple materials and tension—perfect for book storage.
MATERIALS


x02
1” x at least 8”
rods (sticks, dowels, pipes, etc)
x02
1” x at least 8”
rods (sticks, dowels, pipes, etc)
x02
1” x at least 8”
rods (sticks, dowels, pipes, etc)
x04
1/2” x 3”
rods (sticks, dowels, pipes, etc)
x04
1/2” x 3”
rods (sticks, dowels, pipes, etc)
x04
1/2” x 3”
rods (sticks, dowels, pipes, etc)
x02
35” x desired shelf depth
planks
x02
35” x desired shelf depth
planks
x02
35” x desired shelf depth
planks
x01
bike tube
x01
bike tube
x01
bike tube
TOOLS
drill
+ 1/2” drill bit and 1” hole saw bit
drill
+ 1/2” drill bit and 1” hole saw bit
drill
+ 1/2” drill bit and 1” hole saw bit
rubber mallet
rubber mallet
rubber mallet
scissors/knife
scissors/knife
scissors/knife
sewing machine
sewing machine
sewing machine
STEPS
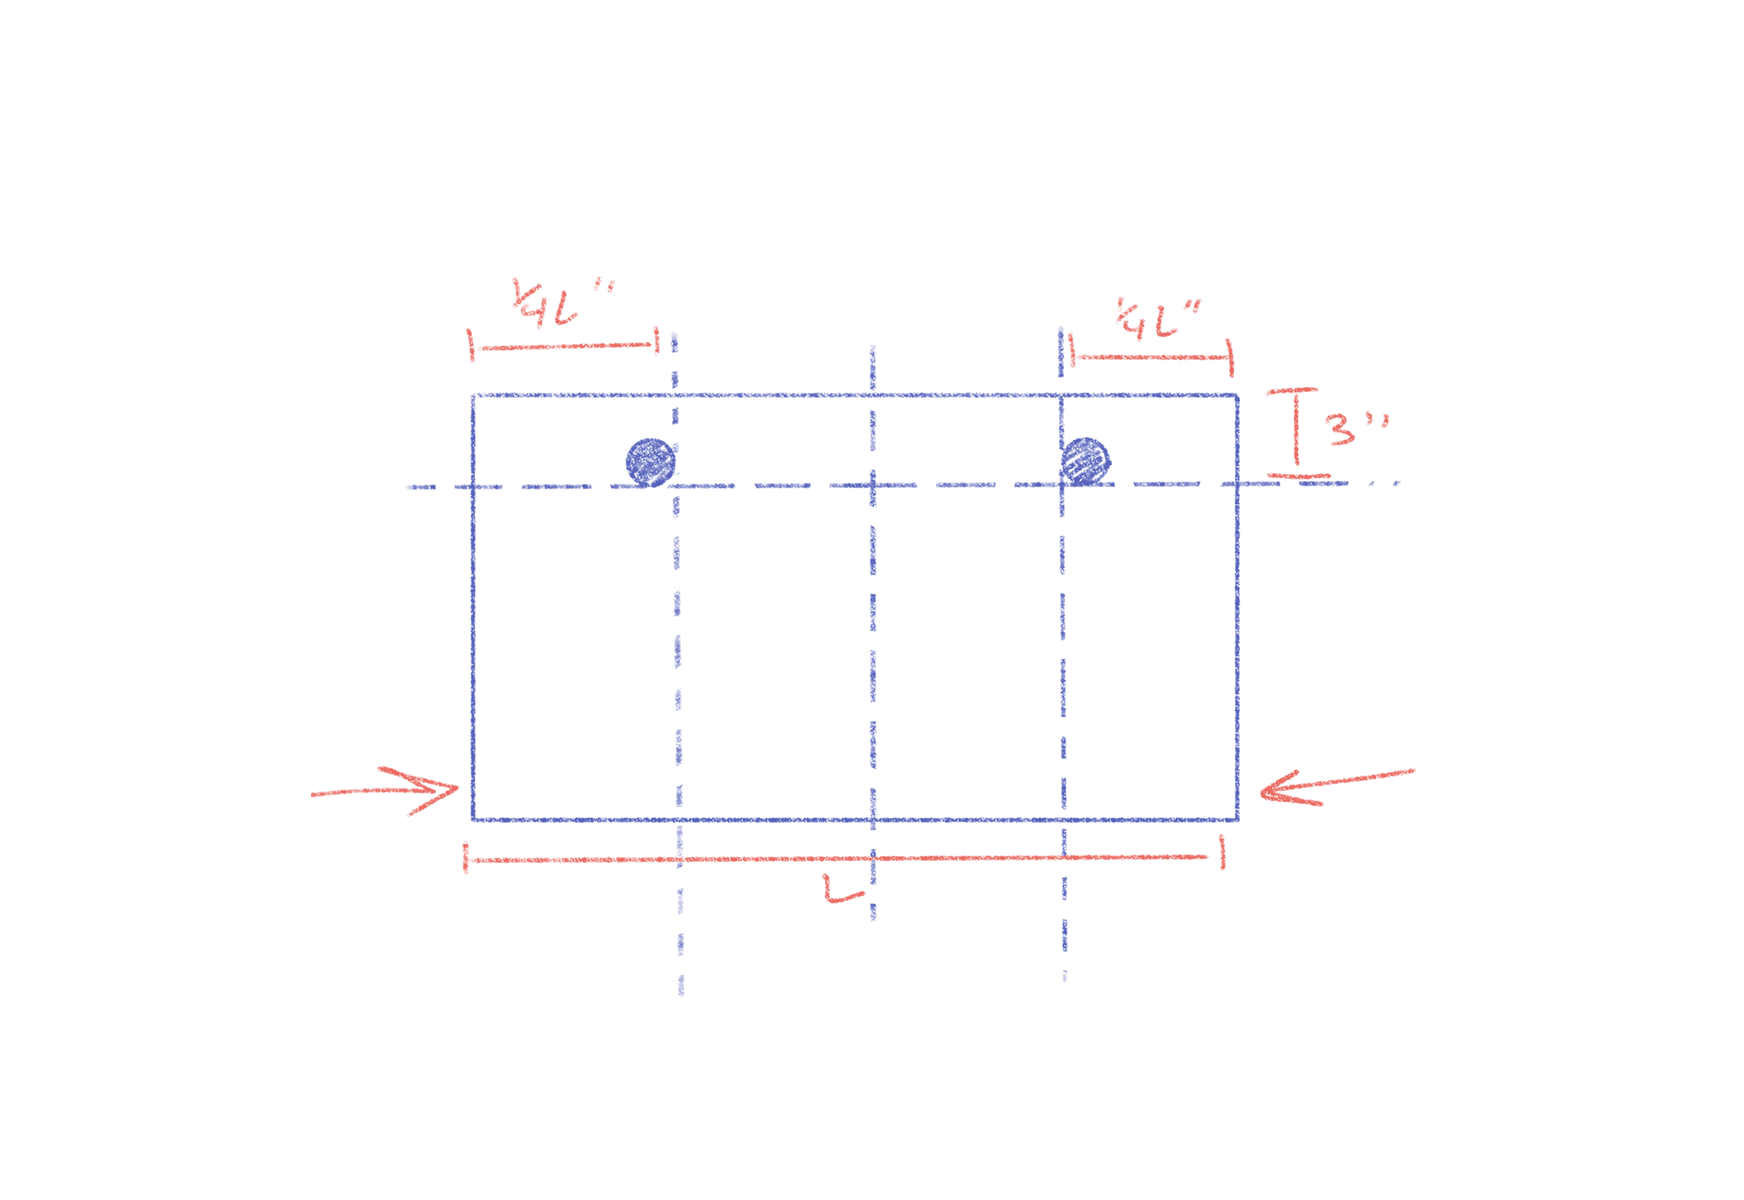
01
Using the 1” hole saw bit, drill 2 holes 3” away from the back edge, and 1/4 of the plank’s width from each side.
01
Using the 1” hole saw bit, drill 2 holes 3” away from the back edge, and 1/4 of the plank’s width from each side.
01
Using the 1” hole saw bit, drill 2 holes 3” away from the back edge, and 1/4 of the plank’s width from each side.

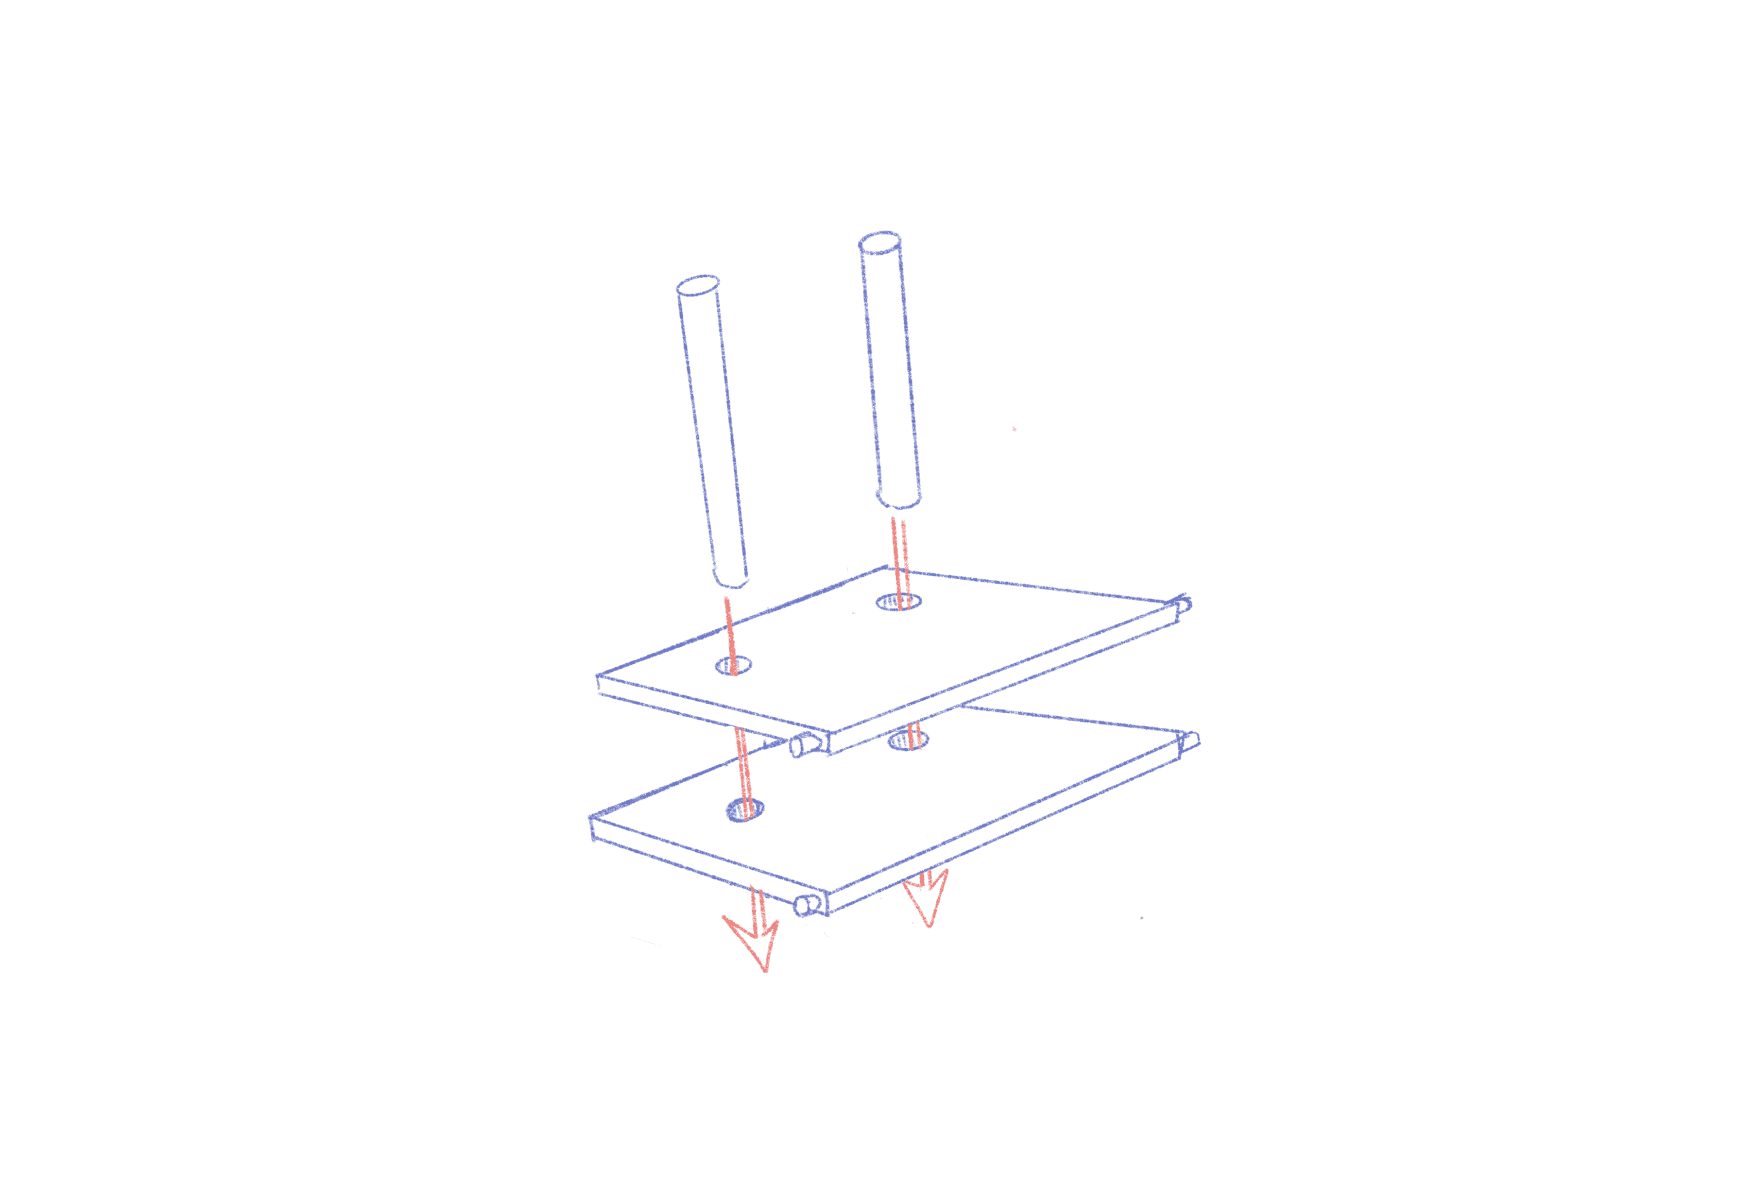
02
Using the 1/2” drill bit, make a hole roughly 1.5” deep in the corners opposite the 1” holes (see diagrams + red arrows) and hammer in two of the rods. Repeat for the other plank
02
Using the 1/2” drill bit, make a hole roughly 1.5” deep in the corners opposite the 1” holes (see diagrams + red arrows) and hammer in two of the rods. Repeat for the other plank
02
Using the 1/2” drill bit, make a hole roughly 1.5” deep in the corners opposite the 1” holes (see diagrams + red arrows) and hammer in two of the rods. Repeat for the other plank
03
Fold down each side and sew as shown to the left. These will make up the slots for the 7’ + 8’ beams. Cut along cut line.
03
Hammer the 1” rods through the 1” holes, and glue them in place while the two planks are separated by the width of the plank they will later clamp onto. Keep the extra length of the dowels for possible additions, or saw it down for a clean look.
03
Hammer the 1” rods through the 1” holes, and glue them in place while the two planks are separated by the width of the plank they will later clamp onto. Keep the extra length of the dowels for possible additions, or saw it down for a clean look.
03
Hammer the 1” rods through the 1” holes, and glue them in place while the two planks are separated by the width of the plank they will later clamp onto. Keep the extra length of the dowels for possible additions, or saw it down for a clean look.
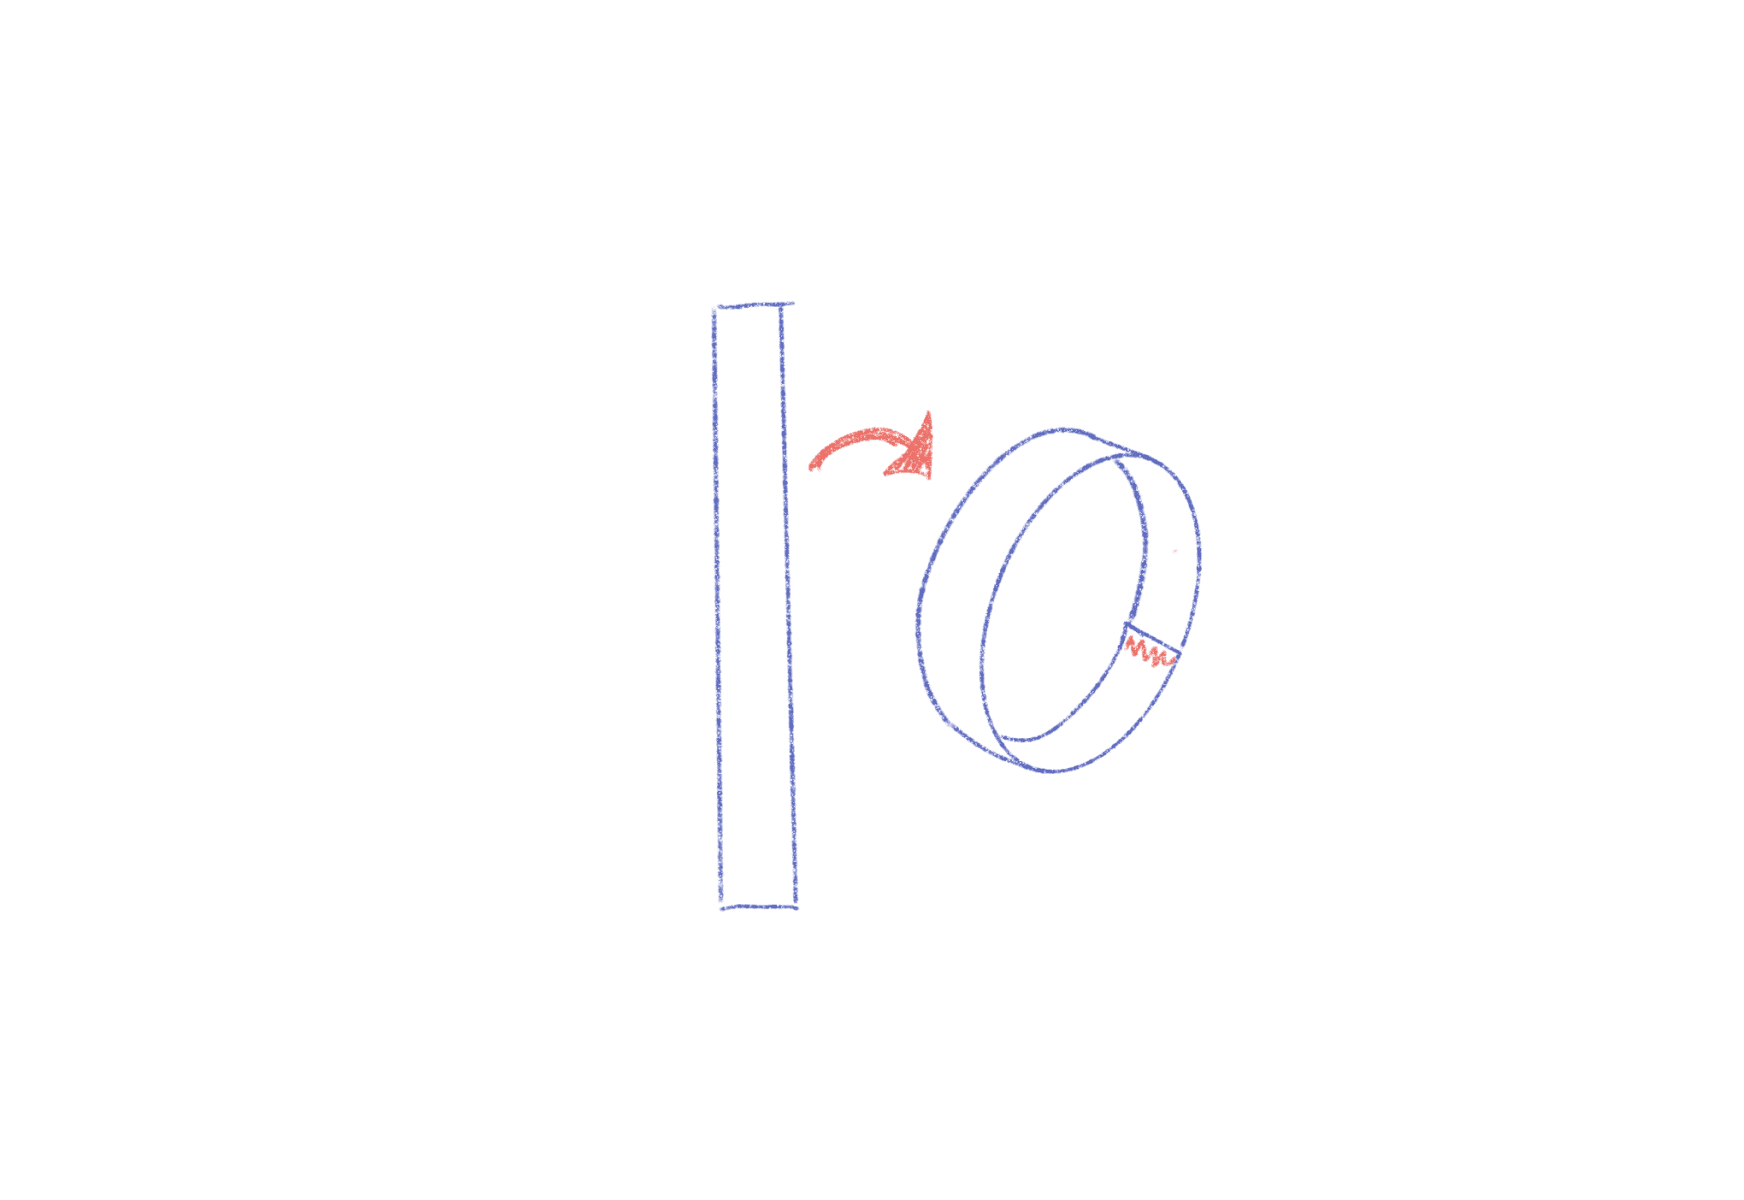
04
Cut 2 x 4” strips of bike tube and sew each one’s ends together to make them into “rubber bands”
04
Cut 2 x 4” strips of bike tube and sew each one’s ends together to make them into “rubber bands”
04
Cut 2 x 4” strips of bike tube and sew each one’s ends together to make them into “rubber bands”
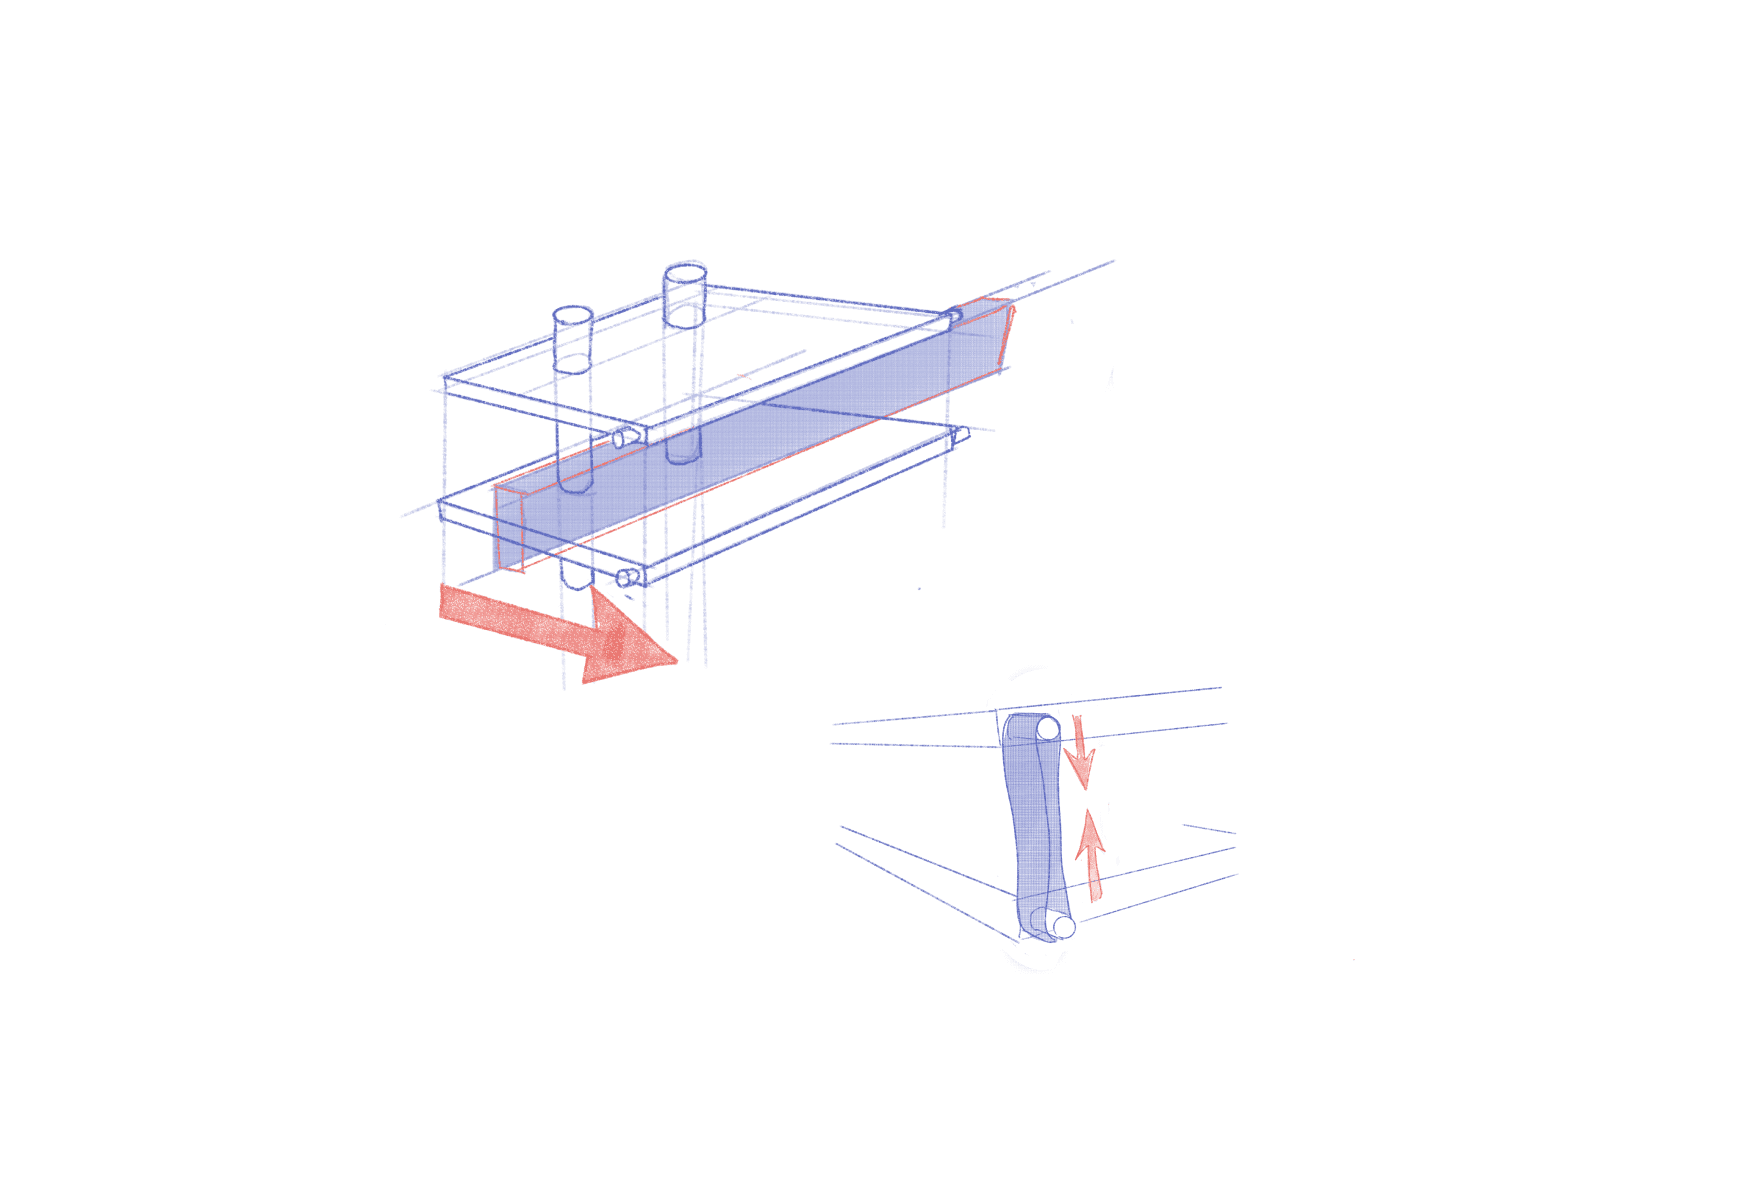
05
Put one “rubber band” to connect each pair of 1/2” rods. the tension of these will clamp the shelf onto the crossbar. If the crossbar you are using is not enough to clamp onto, place a block of the same height in the shelf to give it something else to clamp onto.
05
Put one “rubber band” to connect each pair of 1/2” rods. the tension of these will clamp the shelf onto the crossbar. If the crossbar you are using is not enough to clamp onto, place a block of the same height in the shelf to give it something else to clamp onto.
05
Put one “rubber band” to connect each pair of 1/2” rods. the tension of these will clamp the shelf onto the crossbar. If the crossbar you are using is not enough to clamp onto, place a block of the same height in the shelf to give it something else to clamp onto.
07
Stand the walls up, and secure the 6’ lightweight beams onto the diagonal bars of the walls using the “rubber bands”.
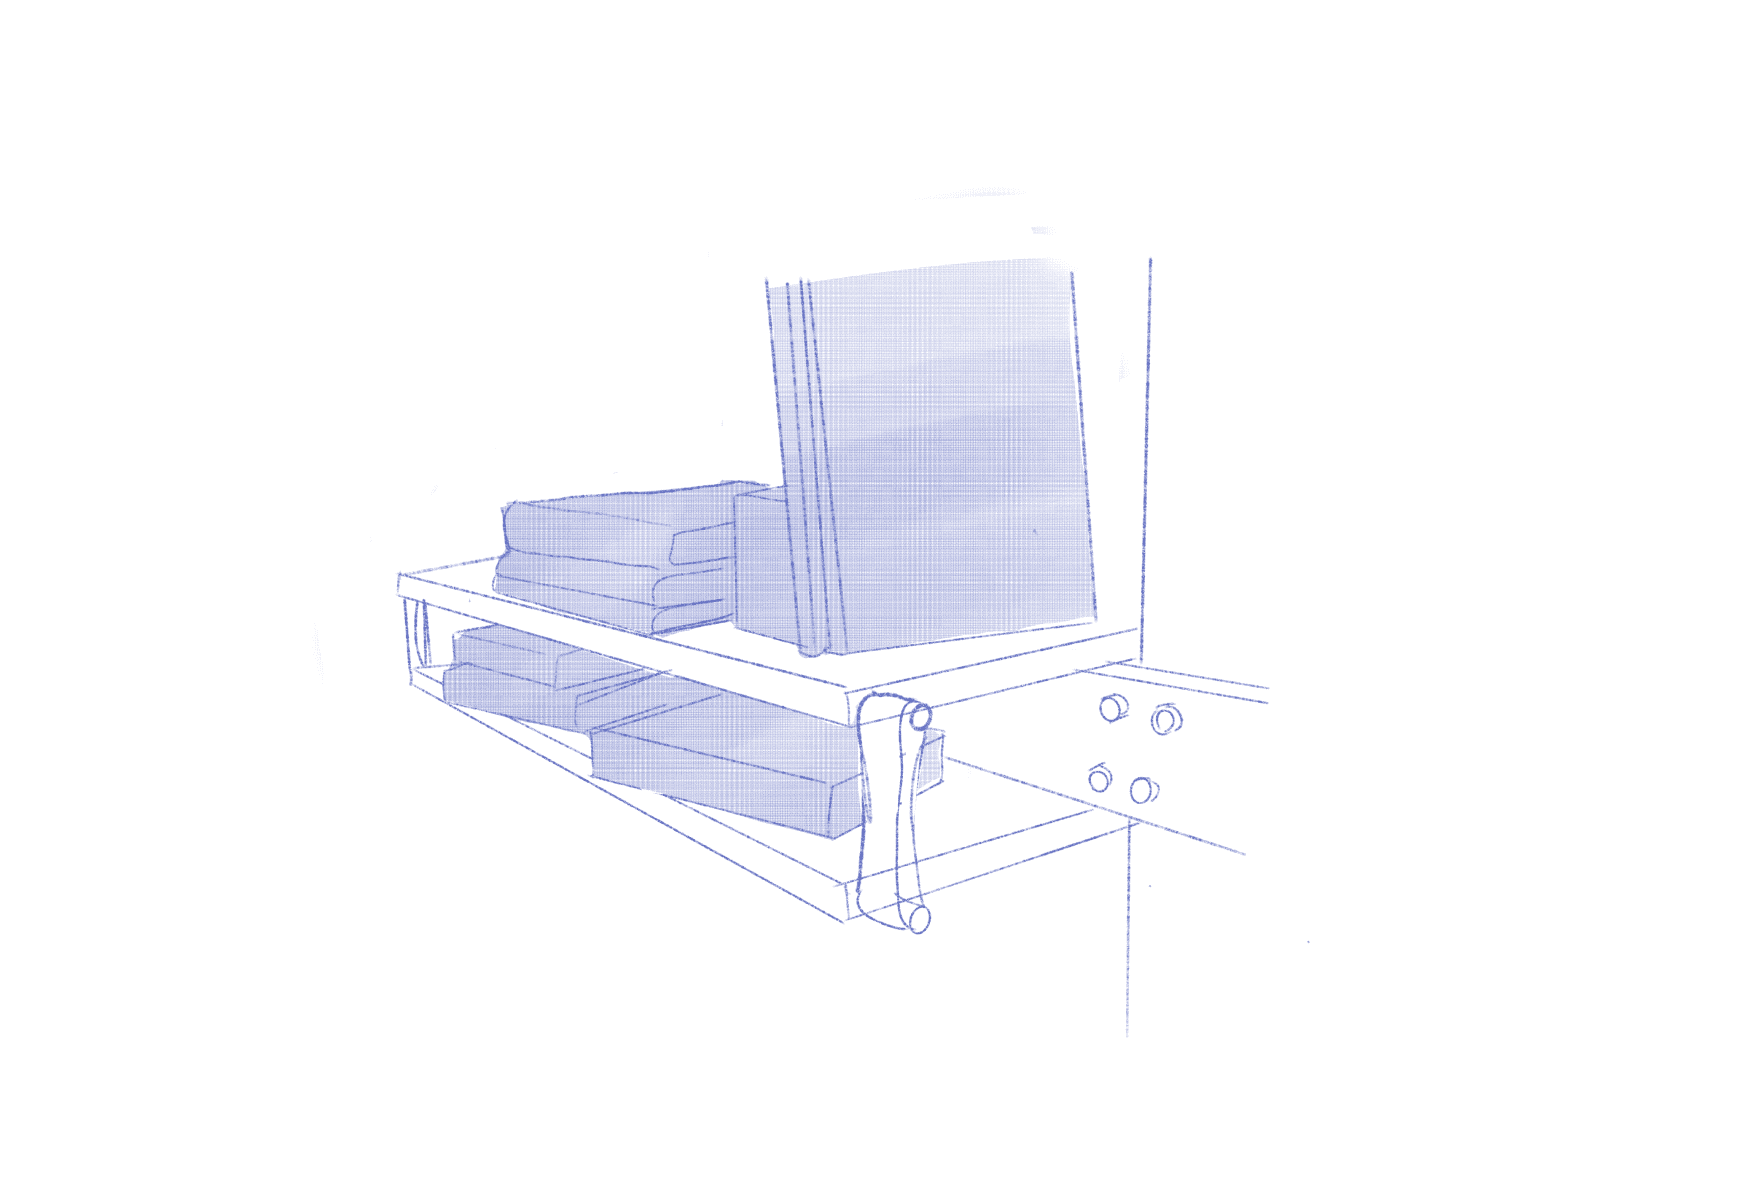
06
The shelves are now complete! Add another level to them, or stack milk crates to level up your storage and add as many as your heart desires.
06
The shelves are now complete! Add another level to them, or stack milk crates to level up your storage and add as many as your heart desires.
06
The shelves are now complete! Add another level to them, or stack milk crates to level up your storage and add as many as your heart desires.


COMMUNITY SPACE INTERVENTIONS
THROUGH FOUND MATERIALS
COMMUNITY SPACE INTERVENTIONS
THROUGH FOUND MATERIALS